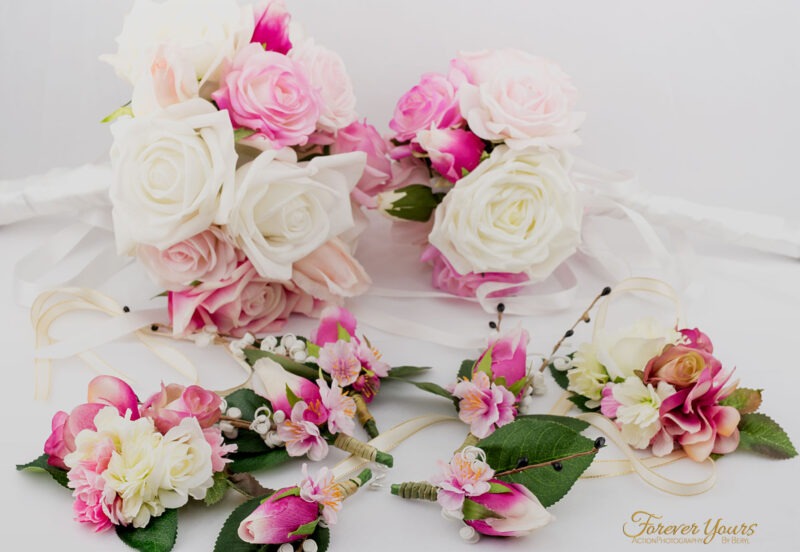
DIY Buttonhole
Call it a buttonhole or a boutonniere, this lapel flair adds the perfect finishing touch for your happy occasion!
A buttonhole is a small arrangement pinned to a man's lapel for formal occasions such as weddings, balls, formals and special family celebrations. It is usually one or two flowers with a few sprigs of greenery.
Even a more casual groom will usually sport a boutonniere, possibly pinned to his shirt pocket if he decides against a jacket or blazer.
If you've been following our blog or Facebook, you'll know that we've been encouraging you to get creative with all this Corona enforced extra time you have on your hands. In the last few weeks, we've talked about DIY Wedding Decor, Wedding Invitations and Bonbonnieres.
And now it's time to talk buttonholes. But we thought we'd go one step further than just talking about buttonholes. We've put together some extra encouragement for you with a little tutorial to make your own buttonhole/ boutonniere. Check out Beryl's Facebook video for a bit of extra help.
To make your beautiful buttonhole you'll Need:
- Buttonhole components - a statement or centrepiece flower; some flat greenery and some trim (for this tutorial we have used a flocked babies breath).
- Florist's Wire
- Florist's Tape
- Pearl Topped Pins
- Ribbon, String, Lace or Hessian (optional for a finishing wrap)
Or you can pop across to our online store and pick up a home buttonhole kit. Our buttonhole kits come with all the things you will need to create your own buttonholes.
Note: as we live and breathe artificial flowers at Forever Yours, Flowers all the bits and pieces we use are, of course, artificial. The roses we encourage you to use are Real Touch roses, they look and feel real and you can keep them forever.
The babies breath is a flocked plastic babies breath and we've added silk rose leaves and small silk coloured flowers.
Having said, you can absolutely use the following tutorial to make fresh flower buttonholes. If you opt to use fresh flowers, just make sure that all of your components are completely dry as Florist's tape will not stick if there is the tiniest bit of moisture.
Also, be sure to do them the night before needed, and store them in the refrigerator overnight.
1. Keep it Trim
Look at each of your buttonhole components with a critical eye. Does it look real to you? Trim any bits and pieces that don't look quite right. This can involve trimming the rose sepal (the greenery underneath the bud) or any excess plastic.
You will also need to trim any leaves attached to your flowers as you want to wire them in separately. Leave an inch of stem on the rose (you'll need something to pin to the lapel with!).
2. Wire it
When creating your buttonholes, you can wire the entire buttonhole together as one. This is a quicker way to do it, but we prefer to wire each component. Wiring each of your components is a little fiddly and time consuming but it will make your creation more sturdy.
That little buttonhole will endure a lot of hugs and crushing throughout the day and you don't want to be worried about it standing up to all that affection! Individual wiring will also add flexibility to the components. This way you can also bend all the pieces to sit just right.
Start with your trim (In this case, babies breath)
Cut your wire to size, about a third of a normal length of florist's wire will do the trick. Fold the cut wire in half with a gentle loop (no harsh edges!). Start half way up the trim, placing the trim inside the wire half.
Working your way downwards, twist the wire down the length of the trim. Continue to twist the wire past the end of the stem (you'll need the length later!)
Next you'll need to wire your rose. The best way to do this is to pierce a hole through the base of the rose, just above the sepal (we use an awl for this but if you don't have an artist's studio at your disposal a metal kitchen skewer will work well).
Next, thread your wire through the hole, the middle of the wire sitting in the middle of the rose bud. Now wind it down the length of the rose stem. Easy!
Wire any additional trim or flowers next. For small flowers wiring underneath the bloom (just on the stem) should be sufficient for stability.
Finally, you get to wire your flat leaf
Rose leaves work beautifully for this, but if you like a different look... go different! Pierce the leaf part way up (about a thumb's space from the base) and either side of the leaves midrib (centre vein).
Fold your wire in half and then thread through a 2nd time, just above the base (above the stem) and through to the other side of the midrib. Now you can wind the two ends of the wire together and down the stem.
Make sure to leave some wire to play with at the base of each stem!
3. Tape it
Grab a short length of paper tape and wrap it down the length of each of your stems and the remaining wire. Make sure to pull it taut as you tape! Florist's tape is quick and easy to use. When wound upon itself it will stick to itself, no need for glue!
4. Put it Together
Start with your rose. Using the wire, adjust the angle of your bud so that it will sit nicely on display. Try it against your own imaginary lapel to make sure it is sitting at a nice (but not too extreme!) angle.
Place the rose against your freshly wired flat leaves. Arrange your trim and then add a little extra colour (your additional flowers) at the base of the rose).
Wind all of your stems together by wrapping a length of florist's tape around them. Add an extra length of florist's tape around the base of your boutonnière.
Trim your beautifully taped wire to size (the standard measure is two fingers below the base of your buttonhole).
Your beautiful buttonhole (yes, or boutinniere!) is now ready to be pinned to a lapel or shirt pocket. Usually all of your the groomsmen will have a buttonhole.
Many couples also opt to give family members and any pageboys a lapel pin for the special day too. The groom's buttonhole will often be slightly more special than that of his bridal party since it is after all, a big day for him!
Buttonholes are usually representative of the colour theme and flowers that the couple has chosen. I say usually, because each couple is different and sometimes the groom may like to make a different choice for his and his groomsmen's buttonholes.
We'd love to see what you're beautiful creations, tag us on facebook or Insta so that we can admire your handiwork.


